


 Cable Automotive / Marine




 Cable Lugs
 Cable Lug Assortment Kits
 Cable Lugs Straight Wall Closed
 Cable Glands
 Convoluted Split Tubing
 12/24v Products & Access




 Electrical Connectors





 Solar Powered Products



 LED Lights







 Tools










 Auto Parts & Categories



 Fittings








 Cleaning & Misc





 Clearance & Promotion
Latest News
Are Heat Shrink Connectors Waterproof Enough?
Sep
A failed cable joint rarely happens in the workshop. It happens on a corrugated track, under a wet trailer, in a boat bilge or when a fridge circuit is working hard in summer. The real question is whether heat shrink connectors are waterproof enough for the job, not whether they simply look sealed when first fitted.
For 12V and 24V wiring, adhesive-lined heat shrink terminals can provide a highly effective moisture-resistant seal when they are correctly sized, crimped and heated. They are a practical choice for vehicle accessories, caravans, marine wiring and outdoor power systems. But they are not a substitute for sound cable routing, suitable circuit protection or the right connector type where regular disconnection is required.
What Makes Heat Shrink Connectors Waterproof?
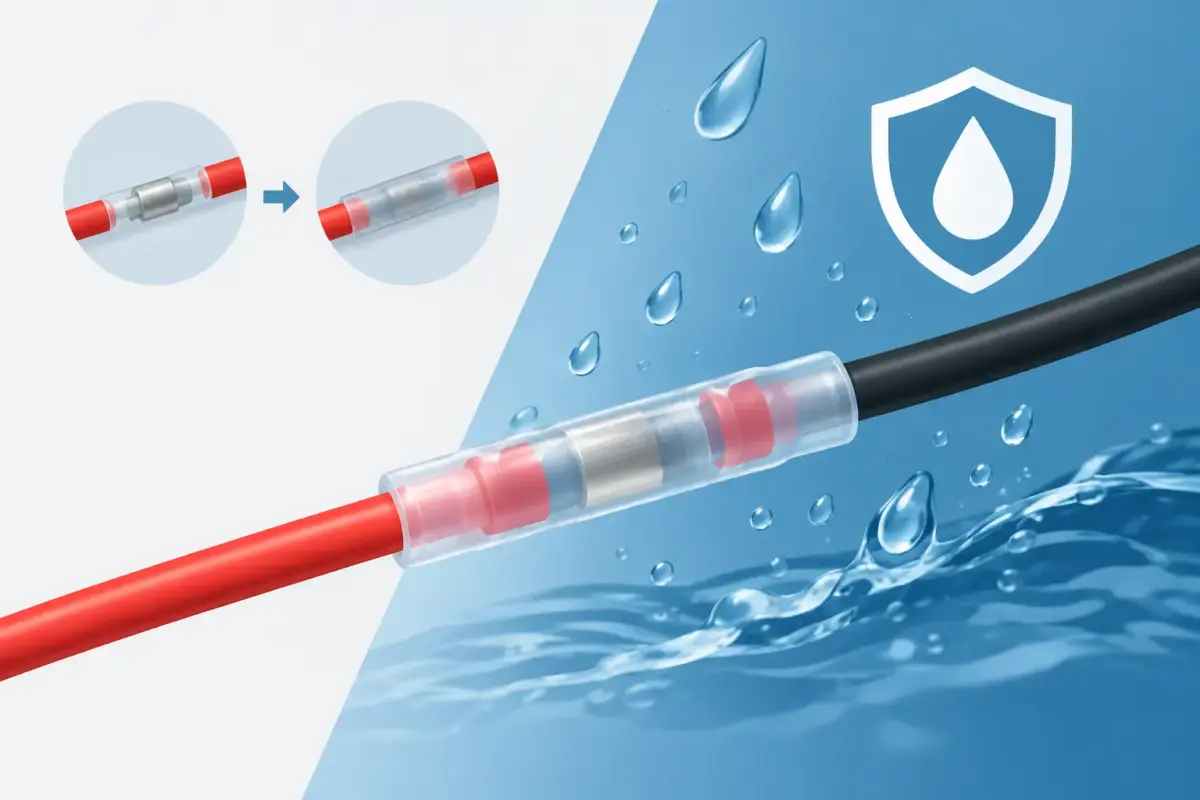
A waterproof heat shrink connector combines an insulated crimp barrel with heat shrink tubing. The better versions use an internal adhesive lining. As heat is applied, the tubing contracts around the cable insulation and the adhesive flows into small gaps at the wire entry point.
This creates a seal that helps keep out splash, dust, humidity and contaminants. It also supports the cable at the terminal, reducing movement at a point where vibration can otherwise fatigue copper strands. That matters on 4WDs, trailers, caravans and work vehicles, where wiring is exposed to vibration far more often than it is in a fixed installation.
Not every heat shrink terminal offers the same protection. A basic heat shrink connector without adhesive may tighten around the insulation, but it can still allow capillary moisture to travel along the cable. Adhesive-lined terminals are the better option for external wiring, underbody applications and any connection exposed to water or road grime.
Where Sealed Heat Shrink Terminals Work Best
Heat shrink crimp terminals suit permanent or semi-permanent cable joins. They are commonly used for joining accessory wiring, repairing trailer lighting circuits, terminating cable to ring terminals, connecting earth leads and wiring LED lights, pumps, compressors and solar-related accessories.
They are particularly useful where a normal insulated terminal would be exposed to spray or moisture. For example, a join behind a caravan tail light, a cable repair near a boat trailer axle or an auxiliary battery earth connection can all benefit from adhesive-lined heat shrink.
They are less suitable where a circuit needs to be unplugged regularly. A fridge lead, removable solar panel or detachable work light generally needs a purpose-made plug and socket such as an Anderson-style connector, Deutsch connector or another connector rated for the current and environment. Heat shrink terminals seal a joint, but they do not create a serviceable connection.
Waterproof Does Not Mean Submersible
The word waterproof is often used broadly. In practical automotive electrical work, heat shrink connectors are usually best regarded as water-resistant sealed terminals unless the product is specifically rated for immersion and installed to that rating.
A correctly installed adhesive-lined terminal will cope well with rain, wash-down splash, road spray and condensation. It may not hold up indefinitely when sitting underwater, exposed to fuel or chemicals, or buried in mud under a chassis rail. Water pressure, cable movement and heat cycling can eventually find a path into any poorly supported connection.
For marine use, the standard needs to be higher. Use quality tinned copper cable, adhesive-lined marine-grade terminals and proper cable support. Keep joins above the bilge wherever possible. Even a well-sealed terminal lasts longer when it is not continuously sitting in saltwater vapour or subject to standing water.
Choosing the Right Connector and Cable Size
The connector must match both the cable size and the terminal type. A red, blue or yellow terminal colour may indicate a common cable range, but colour coding is not enough on its own. Check the stated conductor range and confirm that the cable fits the barrel correctly.
If the wire is too small, the crimp can be loose even though the heat shrink looks neat. If it is too large, strands may be cut, forced out of shape or prevented from fully entering the barrel. Either condition raises resistance, creates heat under load and compromises the seal.
Cable selection is equally important. A waterproof terminal cannot correct undersized cable on a high-current circuit. A 12V compressor, inverter, winch accessory or DC-DC charger can draw enough current to expose a poor connection quickly. Select cable according to current draw, cable run length, voltage drop and the conditions around the installation.
For outdoor and mobile systems, use automotive cable with insulation suited to heat, abrasion and vibration. In coastal or marine applications, tinned cable provides additional corrosion resistance. The terminal and cable need to work as a pair.
How to Crimp Heat Shrink Connectors Properly
Most failures come back to preparation or crimping, not the heat shrink itself. Start by cutting the cable cleanly. Strip only enough insulation to let the conductor fully enter the barrel. Excess bare copper outside the barrel gives moisture a path and increases the chance of a short circuit.
Insert the wire until the insulation meets the barrel. Before crimping, check that all strands are inside and none are folded back. Use a ratchet crimping tool or a crimper designed for insulated terminals, rather than squeezing the terminal with pliers. A proper tool applies even pressure in the correct location and gives a repeatable result.
After crimping, perform a firm pull test. The cable should not move in the terminal. This simple check catches weak crimps before they are hidden under heat shrink or cable loom.
Heat the tubing evenly with a heat gun. Begin away from the centre of the joint and work around the terminal, allowing the tube to contract gradually. You should see the adhesive form a small bead at the cable entry points on adhesive-lined terminals. That bead is a useful sign of a completed seal.
Avoid using an open flame where possible. A lighter can scorch the tubing, burn the insulation or concentrate too much heat in one spot. It can also leave a terminal looking finished while the adhesive has not flowed evenly. A controlled heat gun produces a cleaner result and is easier to use around sensitive vehicle wiring.
Common Installation Mistakes
The most common error is heating a connector before confirming the crimp is sound. Once adhesive-lined tubing has shrunk, reworking the joint usually means cutting it off and starting again. That is cheaper than leaving a suspect connection in a circuit, especially on a critical lighting, charging or battery cable.
Another mistake is joining damaged cable without addressing why it was damaged. If a wire has rubbed through against a sharp bracket, simply adding a waterproof connector will not solve the issue. Fit split conduit, abrasion protection or grommets, then secure the cable with appropriate clips. Leave enough slack for suspension movement, but not so much that the loom can rub or hang below the chassis.
Poor placement also shortens connector life. Keep joins away from direct exhaust heat, sharp edges and areas where water pools. When a join must sit low on a vehicle or trailer, position it so the cable entry points face down where practical. This helps reduce the chance of water tracking along the cable and into the terminal.
Checking a Heat Shrink Joint Before It Causes Trouble
A visual inspection can reveal plenty. Look for fully shrunk tubing, adhesive visible at both ends, no exposed copper and no signs of melted or damaged insulation. The cable should be supported close to the connector so the terminal is not carrying the weight of the loom.
For higher-current circuits, check voltage drop under load. A connection can pass a simple continuity test yet still develop resistance when a compressor, lighting circuit or charging system is drawing current. Heat around a terminal, dim lights, intermittent accessories or a voltage drop that is higher than expected are reasons to inspect the joint.
If corrosion has travelled into the cable, do not crimp over it. Cut back to clean, bright copper before fitting a new connector. Green or blackened strands are a warning that moisture has already entered the wiring, and sealing that section only traps the problem in place.
The Right Seal Starts With the Right Installation
Heat shrink connectors are a reliable way to protect permanent 12V and 24V cable connections from the conditions Australian vehicles, trailers and boats routinely face. Their performance depends on using adhesive-lined terminals, correctly matched cable, a proper crimping tool and sensible cable routing.
For a repair that needs to last beyond the next trip, treat the connector as one part of the installation. A clean crimp, sound cable protection and a connection positioned out of harm’s way will do more for long-term reliability than extra heat shrink alone. Bluebar Industries stocks the practical connectors, cable and workshop gear needed to build those jobs properly.











