


 Cable Automotive / Marine




 Cable Lugs
 Cable Lug Assortment Kits
 Cable Lugs Straight Wall Closed
 Cable Glands
 Convoluted Split Tubing
 12/24v Products & Access




 Electrical Connectors





 Solar Powered Products



 LED Lights







 Tools











 Auto Parts & Categories



 Fittings








 Cleaning & Misc





 Clearance & Promotion
Latest News
Marine Battery Wiring Guide for 12V and 24V Boats
Aug
A boat can have a fully charged battery and still leave you without a bilge pump, sounder or engine start if the wiring is undersized, unprotected or corroded. This marine battery wiring guide covers the practical decisions behind a dependable 12V or 24V system – from battery layout and cable sizing through to fuses, isolation and termination.
Marine electrical work has less margin for error than a dry-land install. Salt spray, vibration, heat, confined spaces and long cable runs all work against connections. Build the system around the actual loads, protect every conductor close to its power source, and use components rated for the job.
Start with the battery system layout
Before selecting cable or connectors, decide what each battery bank is meant to do. A simple runabout may use one start battery and one main distribution feed. A fishing boat with electronics, livewell pumps and an electric motor often needs separate start and house banks. Larger craft may run a 24V bank for a trolling motor or windlass, while retaining 12V for engine starting and accessories.
Keep starting and house loads separate where practical. The engine start battery should be reserved for starting the engine and any essential engine functions. House batteries supply lighting, communications, refrigeration, pumps and electronics. A voltage-sensitive relay, DC-DC charger or suitable charging arrangement can replenish both banks without allowing accessory loads to flatten the start battery.
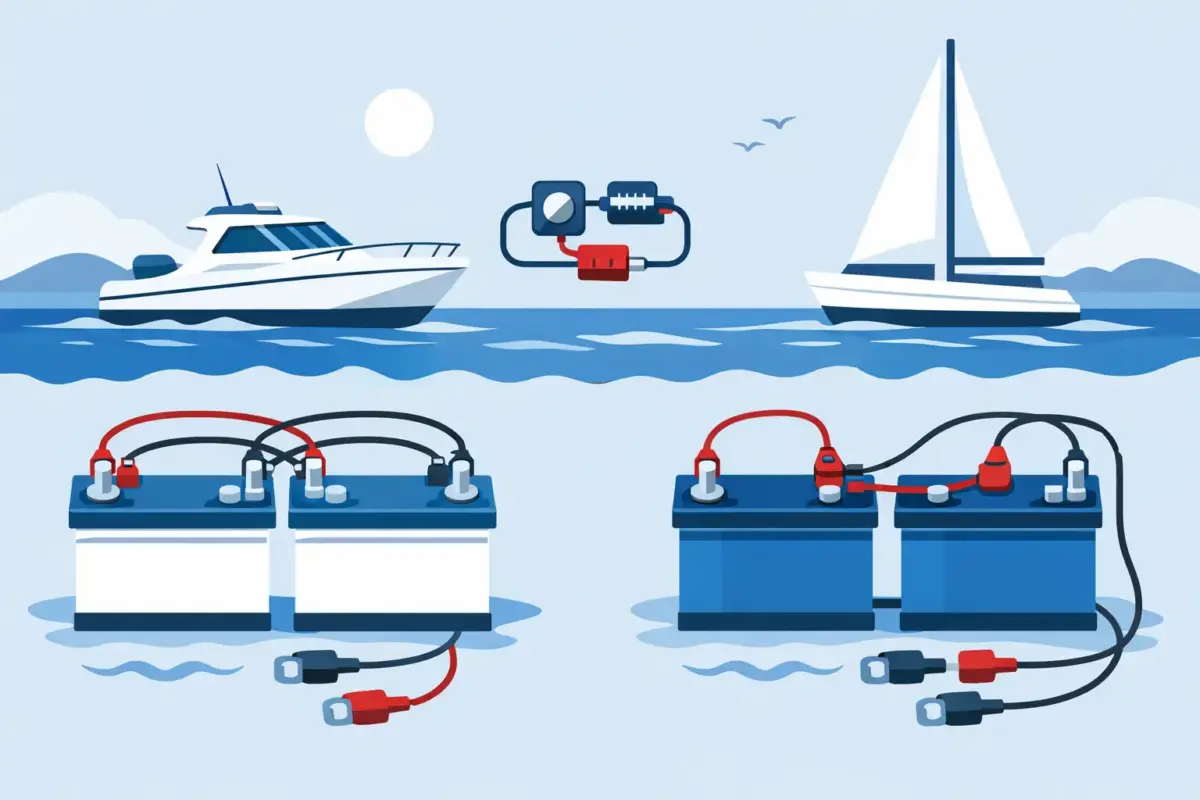
For a 24V bank made from two 12V batteries, wire them in series: positive of the first battery to negative of the second. Take the 24V positive and negative outputs from the two remaining outer terminals. Do not tap 12V accessories from one battery in that pair. It creates unequal discharge and shortens battery life. Use a properly designed 24V-to-12V DC-DC converter for 12V loads instead.
Battery chemistry also affects the design. Lead-acid, AGM, gel and lithium batteries have different charging requirements, discharge behaviour and protection needs. Lithium installations in particular need a compatible charger and a battery management system sized for the expected charge and discharge current.
Calculate loads before choosing cable
Cable size is not based on battery capacity alone. It is selected for the current the circuit will carry, the length of the cable run and the acceptable voltage drop. A short feed to a small LED light has very different requirements to a long run feeding a winch, inverter or electric motor.
Add up the current draw of the devices that may operate at the same time. Use the manufacturer’s rated current where available, rather than guessing from a wattage label. For larger loads, account for startup surge as well as continuous current. Pumps, compressors and motors can draw considerably more current when first switched on.
Cable length means the full circuit path: from battery to load and back to the negative return. In a boat, that round-trip distance can be longer than expected once cable is routed clear of fuel lines, moving gear, sharp edges and wet areas. Voltage drop becomes more noticeable on long 12V runs because a relatively small loss is a large percentage of supply voltage.
As a practical approach, keep voltage drop low for sensitive electronics, navigation lighting and charging circuits. High-current equipment requires cable sized for both voltage drop and safe current capacity. When in doubt, moving up a cable size is usually cheaper than chasing intermittent faults or replacing heat-damaged wiring later.
Use quality tinned copper marine cable where the installation is exposed to moisture, condensation or salt air. Tinned conductors resist corrosion far better than bare copper. Choose cable with insulation suitable for heat, abrasion and marine use, not light-duty household wire.
Positive and negative wiring both matter
Run a dedicated negative return conductor back to a negative busbar or battery negative point. Do not rely on the hull, engine block, rails or other metalwork as the normal return path. Stray-current corrosion and unreliable earth paths are real risks on boats, particularly where dissimilar metals and water are involved.
A properly rated negative busbar keeps returns organised and makes fault-finding faster. Match the busbar rating to the combined current it may carry, and ensure its main negative cable is sized for that load. For systems with engine charging, shore power equipment or multiple battery banks, the grounding and bonding arrangement can become more complex. Follow the equipment manufacturer’s instructions and use a qualified marine electrician where the system requires it.
Fuse every feed close to the battery
A fuse protects the cable, not just the device. If an unfused positive cable rubs through on a bracket and contacts metalwork, the battery can deliver enough current to melt insulation or start a fire. Fit a main fuse or circuit breaker as close as practicable to each battery positive terminal feeding a cable run.
The fuse rating must be lower than the safe current rating of the cable, but high enough to carry the normal load without nuisance tripping. It also needs to suit the load’s expected surge. A circuit supplying an inverter, for example, may need a high-current fuse and very short, heavy cable. A fuse block feeding accessories lets each smaller branch circuit receive its own correctly rated fuse.
Avoid the common mistake of fitting a larger fuse simply because one keeps blowing. First find out why. The load may be faulty, the cable may be too small, or several accessories may have been added to a circuit that was never designed to carry them.
Fit isolation that works in an emergency
A battery isolation switch gives you a quick way to shut down a bank during maintenance, storage or an electrical fault. Select a switch with a continuous and cranking current rating that suits the circuit. A lightweight switch may be fine for a house bank but unsuitable in an engine start circuit.
Mount isolation switches where they can be reached without pulling half the boat apart. Label them clearly, especially where there are separate start, house and 24V banks. If a bilge pump needs automatic operation while the boat is unattended, its feed may be wired separately from the main switched accessory circuit, with its own fuse and appropriate protection.
Build terminations that survive vibration and salt
Most marine wiring failures occur at a termination, not in the middle of a cable. Use correctly sized lugs, terminals and crimping tools. A crimp should grip the conductor firmly without crushing or cutting strands. For high-current battery cables, use heavy-duty lugs matched to both the cable size and stud diameter.
Heatshrink with adhesive lining provides strain relief and seals the rear of a terminal against moisture. Cover battery positive terminals and exposed positive busbars with insulating boots or covers. Keep cables supported with suitable clamps at regular intervals, and add conduit, split tubing or edge protection where a run passes through a bulkhead or near an abrasive surface.
Do not twist wires together and wrap them in tape. Do not use household terminal blocks in wet compartments. Avoid mixing random connector types where a rated, locking connector or sealed junction is available. For removable loads and charging leads, use connectors with a current rating that matches the circuit, positive locking where needed, and contacts protected from accidental shorting.
A practical marine battery wiring guide checklist
Before commissioning the system, check the installation from battery to load. Confirm every positive feed is fused near its source, every cable is appropriately sized, and every terminal is tight, insulated and supported. Check that no wiring can chafe against steering gear, hot exhaust components, fuel lines or sharp fibreglass edges.
Label batteries, isolation switches, busbars, fuse blocks and major cables. Labels save time when fault-finding at the ramp or offshore, and they make future upgrades safer. Keep a simple wiring diagram onboard or with the vessel records, showing battery banks, fuse ratings, cable sizes and charging equipment.
With the batteries isolated, use a multimeter to check continuity and verify there are no unintended shorts between positive and negative. Then energise one circuit at a time. Check voltage at the battery and at the load while it is operating. A significant voltage drop points to undersized cable, a poor joint or excessive load.
For custom battery leads, extension leads, cable protection, lugs, fuses, busbars and connectors, Bluebar Industries supplies practical 12V and 24V components suited to real installation work. Selecting matched parts from the outset makes the job cleaner and avoids making a critical connection the weak point.
The best time to improve marine wiring is before the next long run, not when a navigation light fails after dark. Trace one circuit at a time, replace suspect terminations, and give every cable the protection it needs to keep working in saltwater conditions.











