


 Cable Automotive / Marine




 Cable Lugs
 Cable Lug Assortment Kits
 Cable Lugs Straight Wall Closed
 Cable Glands
 Convoluted Split Tubing
 12/24v Products & Access




 Electrical Connectors





 Solar Powered Products



 LED Lights







 Tools










 Auto Parts & Categories



 Fittings








 Cleaning & Misc





 Clearance & Promotion
Latest News
How to Crimp Battery Cable Lugs Properly
Jun
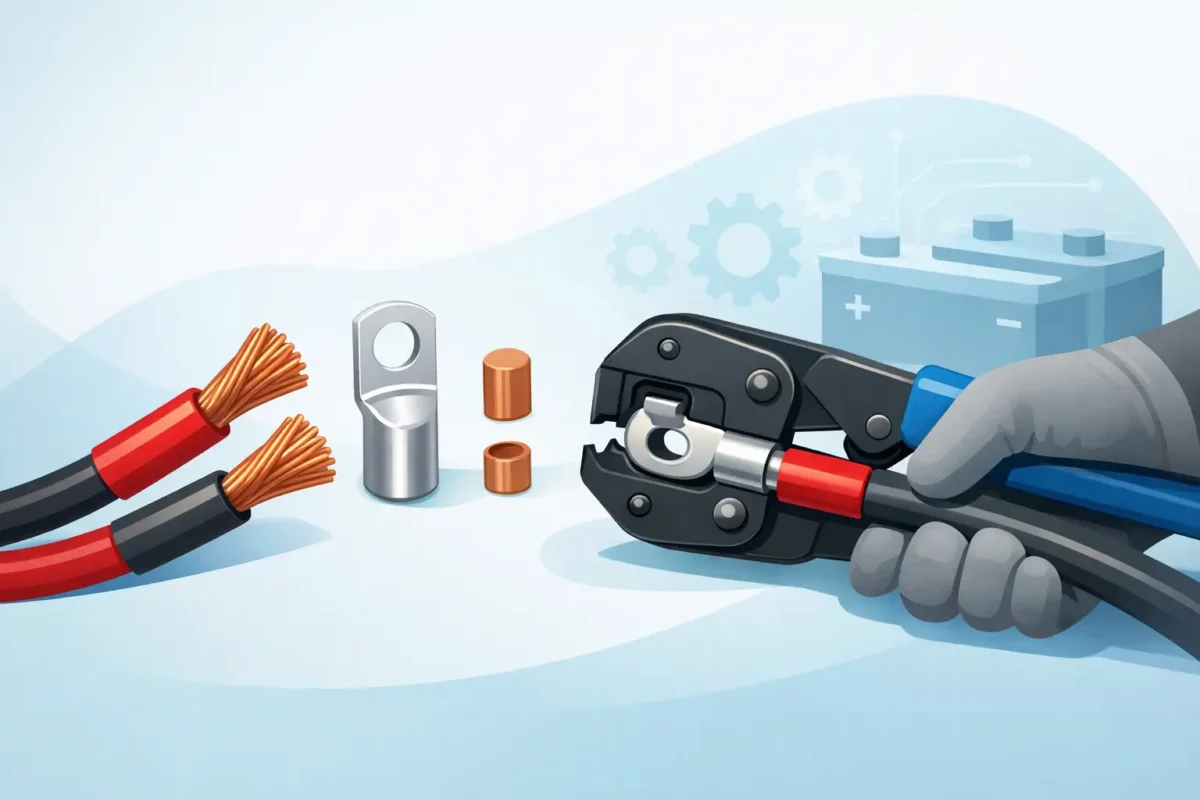
A battery lead that looks fine from the outside can still fail where it matters most – at the lug. If you want to know how to crimp battery cable lugs properly, the goal is simple: make a connection that stays tight, carries current cleanly and survives vibration, heat and weather in real Australian conditions.
That matters whether you are wiring a dual-battery setup in a 4WD, replacing caravan battery leads, fitting marine cables or building heavy DC leads for workshop and fleet use. A poor crimp creates resistance. Resistance creates heat. Heat leads to voltage drop, unreliable gear and, in the worst cases, damaged cable or terminal failure.
Why crimp quality matters
Battery cable lugs deal with high current and harsh service. They are not like light-duty terminals used on accessory wiring. Starter circuits, inverter feeds, winch cables, charging systems and large DC loads all depend on a solid mechanical and electrical bond between the conductor and the lug barrel.
A good crimp compresses the copper strands and the lug barrel together so tightly that the joint behaves almost like one piece of metal. A bad crimp might still pass current at first, but it often shows up later as heat, corrosion, intermittent voltage drop or a lug that pulls off under strain.
In touring, marine and industrial environments, vibration is often the real test. If the cable moves, the crimp needs to hold without loosening. That is why the right tool, the right lug size and the right cable size all matter just as much as technique.
How to crimp battery cable lugs with the right tools
The best result starts before you touch the cable. Battery lugs should be crimped with a proper heavy-duty crimping tool sized for the cable and terminal. Hammer crimpers and improvised methods can work in limited situations, but they are harder to control and less consistent than a quality hex, indent or hydraulic crimper.
For most 12V and 24V battery cable work, a hydraulic crimper gives cleaner, repeatable compression on larger cable sizes. That is especially useful when you are working with thick copper cable for dual-battery systems, inverters or starter leads. Smaller hand crimpers can suit lighter battery cable, but they still need to match the lug and cable range.
You will also need a sharp cable cutter, suitable heat shrink and, if the installation calls for it, adhesive-lined heat shrink for extra sealing. A proper cutter matters because crushed or splayed cable ends make it harder to insert the conductor fully into the lug barrel.
Match the lug to the cable
This is where plenty of problems start. The lug barrel has to suit the cable size, not just the stud size. A lug with the correct eyelet hole but the wrong barrel diameter will never crimp properly.
Battery cable is usually sized by cross-sectional area. The lug needs to match that cable size closely so the copper fills the barrel before crimping. If the barrel is too large, the crimp can feel tight but still leave gaps inside. If it is too small, you will damage strands trying to force the cable in.
Material also counts. For most battery and DC power applications, tinned copper lugs are preferred because they offer good conductivity and better corrosion resistance than plain copper, especially in marine or exposed installations. Thin, low-grade terminals are false economy on high-current work.
Preparing the cable properly
Cut the cable square. A clean end helps the strands seat evenly inside the lug barrel. If the end is frayed, trim it back and start again. Do not twist the strands excessively to make them fit. That can distort the conductor and reduce the effective contact area.
Strip only enough insulation to match the barrel depth. Too little stripped length means incomplete insertion. Too much leaves exposed conductor outside the lug, which is poor practice and increases the chance of corrosion or shorting.
Before crimping, slide the heat shrink onto the cable. It sounds obvious, but it gets forgotten often enough in workshops and sheds everywhere. Once the lug is crimped, you will not be getting it over the terminal end.
The crimping process
1. Insert the cable fully
Push the stripped conductor all the way into the lug barrel until it bottoms out. You should feel that it is properly seated. On some lugs, you can confirm this by checking through the inspection opening if one is present.
The insulation should come close to the barrel entrance without being trapped in the crimp zone. If the cable does not go in smoothly, stop and check the size match rather than forcing it.
2. Position the lug in the die correctly
Set the lug in the correct die size for the barrel. If you are using a hex or indent crimper, the die selection must match the cable and terminal range. Too small and you risk splitting the barrel. Too large and the crimp will be loose.
Crimp location matters as well. Most battery lugs should be crimped along the barrel area, generally starting closer to the palm and then working back if multiple compressions are needed on larger lugs. You want full compression of the conductor area without deforming the eyelet.
3. Apply firm, complete compression
With a hydraulic crimper, complete the full stroke so the barrel is properly compressed. Partial crimps are a common cause of hot joints. If the lug size requires more than one crimp, make them evenly spaced along the barrel.
The finished crimp should look uniform and solid, not crushed randomly or split along the seam. A neat crimp is usually a sign that the die, lug and cable sizes were matched correctly.
Should you solder battery lugs?
This depends on the application, but for most automotive, 4WD, caravan and marine battery leads, a proper crimp is the preferred method. Crimping gives strong mechanical retention and handles vibration better when done correctly.
Soldered lugs can work, but they come with trade-offs. Too much solder can wick up the cable strands and create a stiff section behind the lug. In a vibrating environment, that stiff point can become a failure point over time. Solder also does not fix a poor mechanical fit between lug and cable.
Some installers use a crimp-and-solder approach, but if the crimp is done properly with the right lug and tool, extra solder is generally unnecessary.
How to check if the crimp is good
A battery cable crimp should pass a simple inspection before it ever goes into service. First, give it a solid pull test by hand. The cable should not move in the lug barrel.
Next, inspect the barrel for cracks or splits. If the lug has fractured, it is scrap. Also look for uneven compression, exposed strands or insulation trapped in the crimp.
After installation, load testing tells the real story. If the terminal runs hotter than expected under current, that points to resistance in the joint. A good crimp stays electrically efficient. In practical terms, that means less voltage drop and more dependable system performance.
Common mistakes when crimping battery cable lugs
One of the most common mistakes is using a cheap lug with thin walls. Even with a decent tool, poor-quality terminals do not compress as consistently as a well-made tinned copper lug.
Another is mismatching metric cable and lug sizes. Close enough is often not good enough on heavy cable. If the fit is loose before crimping, the finished result is already compromised.
The other trap is using pliers, a vice or a cold chisel instead of a proper crimper. That might hold for a while on a light-duty repair, but it is not a reliable approach for high-current battery circuits. If the lead powers a starter, winch, inverter or charging run, the join needs to be done properly.
Protecting the finished connection
Once the crimp is complete, seal it with heat shrink. Adhesive-lined heat shrink is a strong option where moisture, salt, dust or engine-bay grime are part of the job. It supports the cable entry, reduces exposure and helps keep the termination tidy.
Routing matters too. Even the best crimp will suffer if the cable is left unsupported and flexing at the lug. Use clamps, boots or other cable management where needed so the terminal is not carrying constant movement.
When to make your own leads and when to buy them
If you have the right tooling and know your cable sizing, making your own battery leads gives you flexibility for custom lengths and specific terminal layouts. That is useful in tight battery boxes, custom tray setups and marine compartments where off-the-shelf leads do not fit neatly.
If you do not have the right crimper, or you are working on critical high-current circuits, buying professionally made leads can be the better option. That is often the safer call for trade jobs, fleet maintenance or installs where downtime costs more than the lead itself. Bluebar Industries supplies both the components and the practical gear needed for this kind of work, which makes it easier to source the right setup without guessing.
A clean battery lug crimp is not about making the cable look finished. It is about building a connection you can trust when the vehicle is corrugated-out, the boat is wet, or the worksite is unforgiving. If the cable matters, the crimp does too.











