


 Cable Automotive / Marine




 Cable Lugs
 Cable Lug Assortment Kits
 Cable Lugs Straight Wall Closed
 Cable Glands
 Convoluted Split Tubing
 12/24v Products & Access




 Electrical Connectors





 Solar Powered Products



 LED Lights







 Tools










 Auto Parts & Categories



 Fittings








 Cleaning & Misc





 Clearance & Promotion
Latest News
How to Install Anderson Plug on a Trailer
Jul
A trailer Anderson plug is only as reliable as the cable, crimps and circuit protection behind it. The question, “how to install anderson plug on trailer”, usually comes up when adding a trailer battery, running a fridge, connecting portable solar or supplying power to a caravan setup. The plug itself is straightforward. Getting the voltage drop, polarity and protection right is the part that prevents flat batteries, melted cable and frustrating faults on the track.
An Anderson plug is a high-current DC connector, commonly used on 12V and 24V systems. Unlike a standard trailer plug, it is designed for power transfer rather than lights, brakes or signal circuits. Before cutting cable, be clear about what the connection needs to do.
Plan the Anderson plug installation
Most trailer installations fall into one of three jobs: charging a trailer-mounted battery from the tow vehicle, bringing solar power into the trailer, or supplying an accessory circuit. These jobs can use similar connectors, but their wiring requirements are not always the same.
For charging a trailer battery from a vehicle, an Anderson plug should generally feed a DC-DC charger mounted in the trailer. Running alternator power directly to a deep-cycle battery can lead to poor charging performance, particularly with modern smart alternators, and may place unnecessary load on the vehicle wiring. A DC-DC charger manages the charge profile and compensates for voltage loss over a long cable run.
For solar, check whether the Anderson plug will connect to an unregulated panel or to a regulated output. An unregulated panel must feed the solar input of a suitable regulator, not the battery directly. For a 24V setup, ensure every component in the circuit, including the charger, fuse holder and cable insulation, suits the system voltage and expected current.
Cable size matters more than many installers expect. A short lead carrying modest current can use smaller cable than a long run from the vehicle battery to the rear of a trailer. On a tow vehicle and trailer combination, the total circuit length is substantial, so voltage drop becomes a real issue. Select cable based on both the current draw and the full return path length. Heavy-duty twin sheathed cable is usually the practical choice because it keeps the positive and negative conductors together and gives better protection from abrasion.
What you need before fitting an Anderson plug
Use components rated for the intended load rather than choosing solely by the plug’s nominal rating. A 50A-style Anderson connector is common for touring and caravan work, but the contacts must match the cable size and be crimped with the correct tool.
For a professional, durable installation, have the following on hand:
- An Anderson plug housing and correctly sized terminals
- Suitable twin cable for the current and cable run
- A quality heavy-duty crimping tool matched to the terminal type
- Fuse or circuit breaker, fuse holder and the correct fuse rating
- Heatshrink, split conduit, cable ties and mounting hardware
- A multimeter or test light for final polarity and voltage checks
Avoid lightweight automotive cable, undersized terminals and universal crimpers that do not properly compress heavy lugs. A terminal may look secure while carrying high resistance inside the crimp. That resistance creates heat under load and can damage the connector housing.
How to install an Anderson plug on a trailer
Start by disconnecting the trailer battery and isolating any solar input. If the trailer is connected to the tow vehicle, disconnect that as well. You should not be crimping or routing live cable near a battery source.
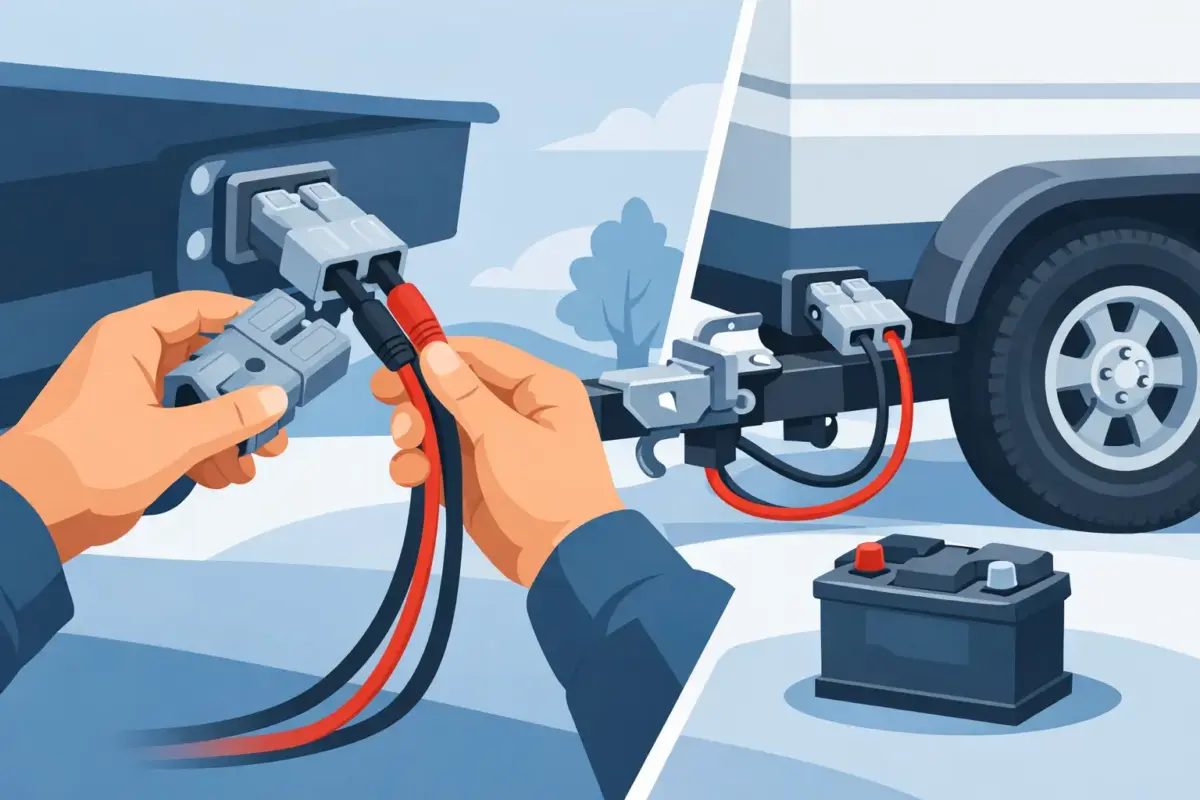
Choose a mounting position that is protected but accessible. On a box trailer, camper trailer or caravan drawbar, a bracket near the front is common. Mount the plug where it will not be struck by stones, dragged through mud or crushed by the jockey wheel. The cable should enter the rear of the housing cleanly, without a sharp bend or constant tension on the terminals.
Run the twin cable from the Anderson plug to the charger, battery or regulator location. Follow the trailer chassis where practical, using conduit in exposed areas and securing the cable at regular intervals. Keep it clear of exhaust heat, suspension movement, sharp steel edges and moving drawbar components. Where cable passes through a steel panel, fit a grommet or suitable edge protection.
Do not use the trailer chassis as the negative return for a high-current charging circuit unless the system has been specifically designed for it. A dedicated negative cable back to the battery or charger provides a more dependable circuit and avoids faults caused by corrosion, poor earth points or painted connections.
Fit circuit protection to the positive cable as close as practical to the power source. This is critical. If power can come from the tow vehicle battery, the vehicle-side positive cable needs a fuse or circuit breaker near that battery. If the trailer battery can feed power back through the same cable, the trailer-side positive circuit also needs protection close to the trailer battery. The fuse protects the cable, so choose its rating around the cable’s safe current capacity and the expected load, not simply the biggest fuse available.
Strip only enough insulation to suit the terminal barrel. Insert the conductor fully into the Anderson terminal, ensuring no bare strands sit outside the barrel. Crimp with a proper lug crimper that produces a firm, even compression. A good crimp will not pull free when tugged firmly and will not have loose strands or a split terminal barrel.
Solder is not a substitute for a correct high-current crimp. Solder can wick up the cable, creating a rigid section that may fatigue under vibration. In trailer, 4WD and marine-style installations, a correctly crimped terminal with adhesive-lined heatshrink provides a better long-term result.
Slide the terminals into the Anderson housing one at a time. The terminals should lock into place with the contact faces correctly aligned. Anderson housings are genderless, which makes connection convenient, but it also means polarity must be deliberately matched between the vehicle and trailer plugs. Follow the polarity marking on the housing and confirm that positive connects to positive and negative connects to negative when the two plugs mate.
Do not rely on cable colour alone, especially on an older trailer or an existing custom lead. Red is commonly positive and black is commonly negative, but testing is the only safe way to confirm an unknown circuit.
Fit the matching vehicle-side plug
The trailer plug is only half the job. On the tow vehicle, run appropriately sized cable from the battery through a fuse or circuit breaker, then route it to a protected point near the towbar. If the vehicle is used off-road, allow enough slack for articulation but not enough for the lead to hang below the towbar or rub on the road.
Where a DC-DC charger is installed in the trailer, follow its cable size, fuse and input requirements. Some chargers require an ignition trigger or voltage-sensitive operation, while others are designed to manage this automatically. The charger instructions take priority over general wiring conventions.
Test the installation before towing
Before connecting the plugs, use a multimeter to test voltage and polarity at the vehicle-side Anderson plug. Confirm that the positive terminal is where you expect it to be, then test the trailer side at the charger or battery connection point.
Connect the plugs and check voltage again under load, such as while the DC-DC charger is operating. A small voltage reduction is normal over a long cable run. A large drop suggests undersized cable, a poor crimp, a weak earth or an overloaded circuit. After several minutes at load, carefully check terminals, fuse holders and cable connections for unusual warmth. Heat is a warning sign, not something to ignore.
Common trailer Anderson plug mistakes
The most common issue is installing heavy-looking cable that is too small internally for the distance and current. The next is omitting a fuse near the battery because the Anderson plug feels like a protected connection. It is not. A damaged positive cable can still short to the chassis and cause serious damage.
Loose crimping, unprotected cable routing and reversed polarity are also regular causes of failure. A plug mounted low on the drawbar without a cover can fill with dust or water, while a cable cable-tied directly to a sharp chassis edge can eventually wear through. A few extra minutes spent on conduit, grommets and mounting makes a major difference in Australian touring conditions.
A properly installed Anderson plug gives your trailer power system a dependable connection point for charging and accessories. Build it around the actual load, cable run and equipment on the trailer, then test it before the first long trip. That is the difference between a connector that works in the driveway and one that keeps working well beyond the bitumen.











