


 Cable Automotive / Marine




 Cable Lugs
 Cable Lug Assortment Kits
 Cable Lugs Straight Wall Closed
 Cable Glands
 Convoluted Split Tubing
 12/24v Products & Access




 Electrical Connectors





 Solar Powered Products



 LED Lights







 Tools










 Auto Parts & Categories



 Fittings








 Cleaning & Misc





 Clearance & Promotion
Latest News
A Guide to Trailer Plug Wiring Standards
Jun
You usually find trailer wiring problems at the worst possible time – when the van is packed, the boat is hooked up, or the work trailer needs to leave now. That is why a solid guide to trailer plug wiring standards matters. Get the plug type, pin function and cable sizing right from the start, and you avoid the usual faults: dead clearance lights, weak earths, electric brake issues and chargers that never see proper voltage.
In Australia, trailer plug wiring is not just about matching colours and hoping for the best. Plug format, pin allocation and circuit load all need to suit the trailer, tow vehicle and intended use. A box trailer for weekend rubbish runs has very different demands from a caravan with electric brakes, a fridge feed and battery charging.
Why trailer plug wiring standards matter
The point of wiring standards is simple – consistency. If the vehicle and trailer are wired to the same standard, the lights work as expected, the brakes activate correctly, and auxiliary circuits do the job they were added for. If they are not, faults can range from annoying to dangerous.
A lot of trouble starts when people assume every 7-pin plug is wired the same, or that a wire colour always confirms circuit function. In practice, older repairs, imported trailers, owner modifications and low-grade harnesses can all break that assumption. That is why testing each circuit matters just as much as knowing the nominal standard.
For trade use, standards also make servicing faster. If a fleet trailer comes in with a known plug format and predictable pin layout, fault-finding is more direct. For DIY users, it cuts down the guesswork when replacing damaged plugs, extending harnesses or fitting an adaptor.
The main trailer plug types used in Australia
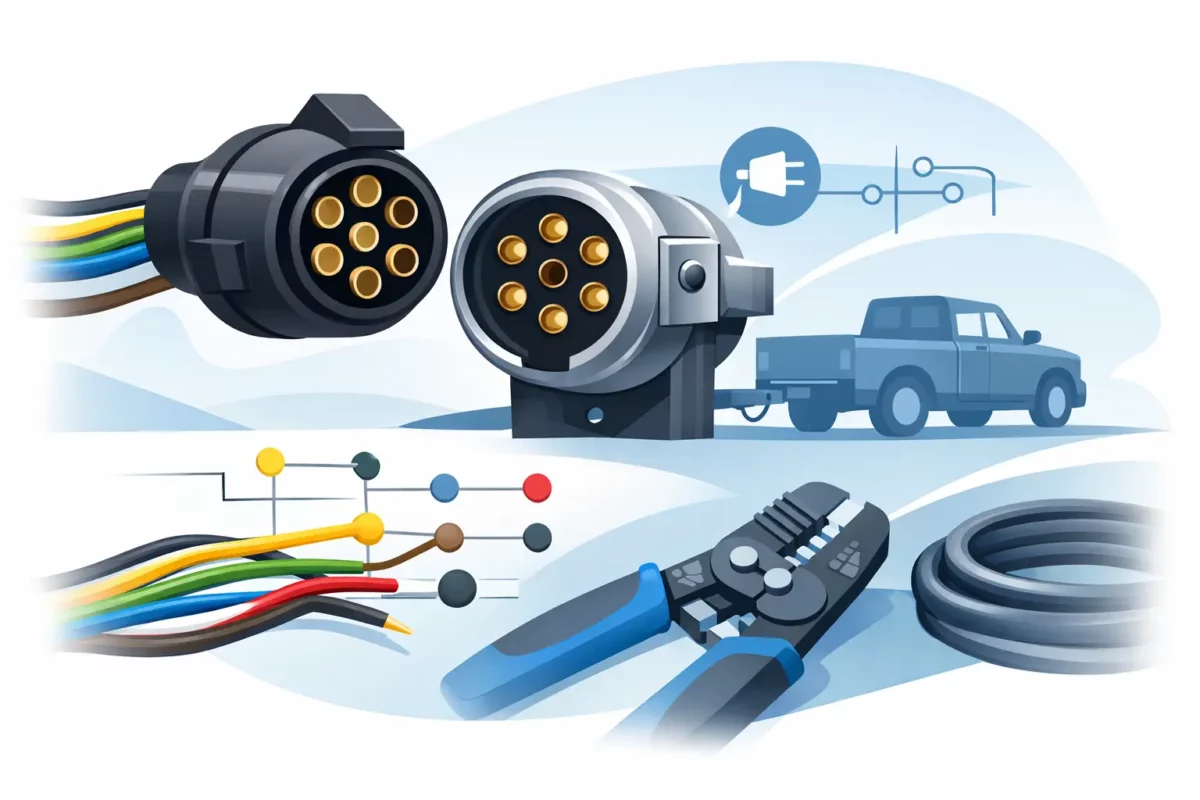
The most common starting point in any guide to trailer plug wiring standards is plug shape and pin count. In Australia, the formats most buyers deal with are 5-pin round, 6-pin round, 7-pin flat, 7-pin small round, 7-pin large round and 12-pin flat.
5-pin and 6-pin round plugs
These are often found on older trailers or more basic setups. A 5-pin plug usually covers the essential lighting circuits only. A 6-pin version adds another circuit, often for brakes or an auxiliary function, depending on how it has been wired.
They still turn up on light-duty trailers, but they are less common for newer caravans and brake-equipped trailers where extra functions are needed. If you are maintaining an older setup, it is worth checking whether keeping the original plug is practical or whether upgrading to a more common standard will make future servicing easier.
7-pin flat plug
For many Australian trailers, this is the default. It is widely used on box trailers, camper trailers, tradesman trailers and plenty of recreational setups. It supports the standard lighting circuits and can also carry electric brake feed or an auxiliary line depending on the pin allocation used.
Its popularity makes sourcing parts, adaptors and replacement sockets straightforward. That said, it is still not immune to poor installations. Flat plugs can suffer bent terminals, weak cable retention and water ingress if low-quality components are used.
7-pin small round plug
This format handles the same general functions as a 7-pin flat, but with a round body and round pin arrangement. You will still see it on older caravans, trailers and some specialist applications.
The main issue is compatibility. A trailer with a small round plug will not connect directly to a flat socket without an adaptor, so mixed fleets or shared towing vehicles can get messy if plug formats vary.
7-pin large round plug
The large round plug is commonly used where electric brakes are fitted. The larger pins suit heavier current loads better than smaller formats, and many caravan and horse float owners still prefer it for that reason.
If the trailer has brakes and regularly sees higher-duty use, large round can be the better option. The trade-off is that it is less universal than the 7-pin flat, so adaptor use becomes more likely if several towing vehicles are involved.
12-pin flat plug
This is a common choice for caravans and more complex trailer setups because it combines the standard 7-pin lighting functions with five extra pins for auxiliary power. Those extra circuits are often used for battery charging, interior power supply, fridge feed or reverse lights.
This is where wiring quality really matters. A 12-pin plug may physically allow more circuits, but it does not automatically solve voltage drop or current capacity issues. If you are trying to run a caravan fridge or charge a house battery through undersized cable, the plug is only part of the job.
Standard pin functions and what they usually do
Australian trailer wiring standards generally assign pins for left indicator, right indicator, tail lights, brake lights, earth and other required or optional circuits. The exact arrangement depends on the plug type, and some pins may be allocated differently between older systems and newer brake or auxiliary setups.
The key point is this: pin number matters more than wire colour. Cable colours often follow common conventions, but repairs and aftermarket wiring can change that. When replacing a plug or socket, confirm each wire by function with a test light or multimeter before terminating anything.
Earth is where many installations fall over. A poor earth can cause all sorts of strange behaviour – indicators flashing dimly through tail lights, brake lights feeding back into other circuits, or electric brakes acting inconsistently. Use clean terminations, adequate cable size and solid mechanical connection. On trailers exposed to mud, salt or constant vibration, that matters more than neatness alone.
Wiring standards are not the same as wiring quality
A trailer can be wired to the correct standard and still perform badly. That usually comes down to cable size, connector quality, sealing and installation method.
For basic lighting circuits on a short box trailer, the current draw is low enough that modest cable sizing may be acceptable. On longer caravans, plant trailers or boat trailers, voltage drop becomes a bigger issue, particularly on tail lights, electric brakes and auxiliary circuits. Running charge lines or fridge feeds through light cable is one of the most common mistakes in mobile power setups.
Connector quality matters as well. Cheap plugs often have poor terminal grip, brittle housings or weak strain relief. In real-world Australian use – corrugations, rain, dust, workshop knocks and coastal exposure – those weaknesses show up quickly.
Common mistakes when matching trailer and vehicle wiring
One common problem is assuming an adaptor fixes everything. Adaptors are useful for physical compatibility, but they do not correct wrong pin assignments, poor earths or undersized charge wiring. If the tow vehicle was wired for basic lighting only, adding an adaptor will not magically provide a proper brake controller feed or caravan auxiliary supply.
Another mistake is mixing standards within one trailer. You might see a replacement plug fitted with different pin use from the original socket, or a reverse light wired into a circuit that was previously allocated to brakes. That can create faults that look random until the wiring is traced properly.
There is also the issue of current demand. A 12-pin caravan plug may carry auxiliary functions, but high-current charging and DC-DC setups often need dedicated connectors and heavier cable outside the trailer plug system. It depends on load, cable run and how the van or trailer is actually used.
How to identify the right standard for your setup
Start with the trailer type and what it needs to do. If it is a light trailer with standard lighting only, a common 7-pin flat setup is often the simplest option. If it has electric brakes, check whether the existing vehicle and trailer are wired for 7-pin flat, 7-pin large round or another established configuration.
If you are dealing with a caravan or a work trailer with auxiliary loads, look beyond the plug alone. Confirm what each extra circuit is meant to supply, what current it will carry and whether the cable size suits the distance from vehicle battery to trailer load.
For workshops and installers, consistency across fleets pays off. Standardising plug type, pin allocation and cable spec across multiple vehicles and trailers makes maintenance easier and reduces downtime. For individual owners, the best standard is often the one that balances compatibility with enough capacity for the job.
Fault-finding before you replace parts
Before replacing a plug, test the socket on the vehicle and the circuits on the trailer separately. A lot of plugs get blamed for faults caused by a failed earth point, damaged loom, corroded lamp holder or bad brake controller output.
Check for voltage under load, not just open-circuit readings. Inspect terminals for heat damage, green corrosion and loose clamping. If the cable has been flexing near the plug entry, strip it back and look for broken strands inside the insulation.
When repairs are needed, use components that suit the environment and the load. That is where a specialist electrical supplier makes a difference. Bluebar Industries works with the kind of connectors, cable, adaptors and workshop gear that actually belong in 12V and 24V installations, not the sort of parts you end up replacing after one rough trip.
Getting trailer wiring right is less about memorising a colour chart and more about matching the standard to the job, then building it properly. If you treat the plug as part of the whole electrical system, not just the bit at the towbar, you will end up with a setup that works when it needs to.











