


 Cable Automotive / Marine




 Cable Lugs
 Cable Lug Assortment Kits
 Cable Lugs Straight Wall Closed
 Cable Glands
 Convoluted Split Tubing
 12/24v Products & Access




 Electrical Connectors





 Solar Powered Products



 LED Lights







 Tools










 Auto Parts & Categories



 Fittings








 Cleaning & Misc





 Clearance & Promotion
Latest News
Ratchet Crimper Review for 12V and 24V Work
Sep
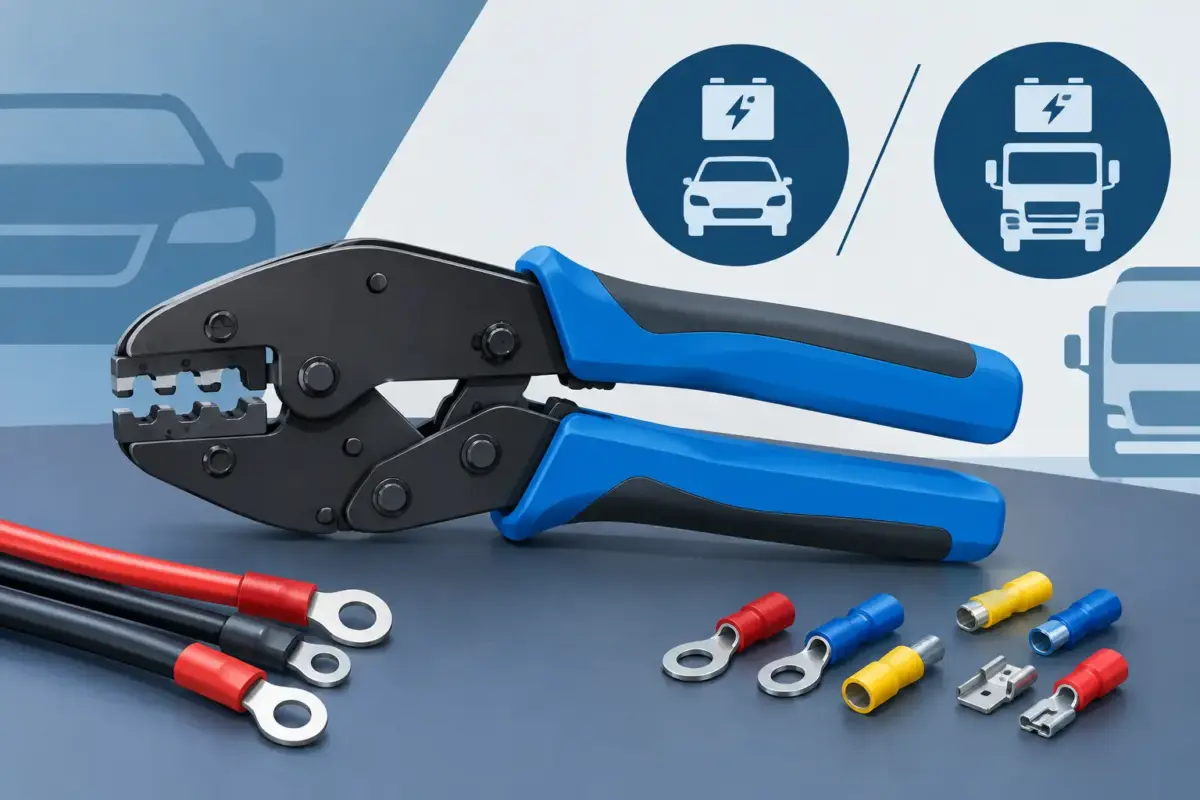
A terminal can look properly fitted, sit tight in the wire and still fail once vibration, heat and current get involved. That is why a ratchet crimper review needs to look beyond whether the handles feel good in the hand. For 12V and 24V vehicle work, the useful question is whether the tool produces a repeatable crimp that suits the terminal, cable and job at hand.
A decent ratchet crimper is one of the most worthwhile tools for anyone wiring a 4WD, caravan, boat, work ute or machinery accessory. It takes much of the guesswork out of applying pressure, particularly compared with basic non-ratcheting pliers. But not every ratchet crimper is designed for every connector type, and buying the wrong jaw profile is a quick way to create unreliable terminations.
What a ratchet crimper should do
The ratchet mechanism holds the jaws closed through the crimp cycle and releases only after the preset pressure has been reached. This gives the user a more consistent result from terminal to terminal. It also leaves one hand free to keep the terminal and cable positioned squarely before the handles are fully closed.
That consistency matters on installations exposed to corrugations, moisture, engine-bay temperature changes and sustained accessory loads. A correctly compressed terminal grips the conductor firmly without cutting strands or leaving voids that can encourage heat and corrosion. A poor crimp adds resistance, and resistance becomes heat when a fridge, compressor, lighting circuit or DC charger is working hard.
The limitation is simple: the ratchet does not make an incorrect die correct. A tool designed for insulated red, blue and yellow terminals is not the right choice for heavy battery lugs, Anderson-style contacts, coax connectors or open-barrel automotive terminals. The crimp needs to match the terminal manufacturer’s intended profile.
Ratchet crimper review: the points that matter
The best way to assess a ratchet crimper is by the termination it creates, not the colour of the handles or the number of accessories packed into the case. There are several practical areas worth checking before it earns space in a tool bag.
Jaw profile and terminal compatibility
For general 12V accessory wiring, a ratchet crimper with colour-coded dies for insulated terminals is often the most useful starting point. Red terminals generally suit smaller cable, blue covers common mid-range automotive cable sizes, and yellow is used for larger insulated terminals. The tool should form an even crimp around the metal barrel while supporting the insulation without crushing it.
Some crimpers use a dimple-style profile, while others make an oval or double compression. Either can work well when it is matched to the terminal design. The issue arises when a generic die is used on a specialised terminal. Heat-shrink terminals, for example, often require a crimp shape that secures the conductor and insulation separately without damaging the heat-shrink sleeve.
Open-barrel terminals used in some OEM-style automotive connectors need a dedicated open-barrel crimper. These terminals have separate wings for the conductor and cable insulation. Trying to close them with a standard insulated-terminal crimper usually creates a messy finish and an uncertain mechanical hold.
Cable size markings need a second check
Many tools are marked in AWG, while cable sold in Australia is commonly described by square millimetres, B&S or automotive cable terminology. Those systems do not always line up neatly, particularly with thin-wall automotive cable or cable that has a different strand count.
Use the marking as a guide, then confirm that the stripped conductor fills the terminal barrel correctly. If strands have to be folded back to fit, the terminal is too large. If the conductor barely enters the barrel, step up to a suitable terminal rather than forcing the crimp. The cable insulation should also fit the terminal support area cleanly.
For larger power cable, use a crimper built for the job. Battery lugs and high-current cable connections need the appropriate hex, indent or dieless crimping method specified for that lug. A hand ratchet crimper intended for pre-insulated terminals is not a substitute for a heavy-duty lug crimper.
Ratchet action, release and adjustment
A good mechanism closes progressively without binding, sticking or changing pressure halfway through the stroke. The release should be positive once the crimp is complete. Most quality tools also include an emergency release lever. This is useful if a terminal is inserted incorrectly or the jaws are closed on the wrong die position.
Adjustable ratchet tension is useful, but it is not an invitation to set the tool by feel alone. Excess pressure can cut conductor strands or split the terminal barrel. Too little pressure creates a loose connection that may pass a quick tug test but loosen after a season of travel. If adjustment is required, use sample crimps with the exact terminal and cable combination, then inspect and test the result before beginning the installation.
Handle comfort and workshop durability
Handle length affects leverage. Longer handles generally reduce hand effort, which is valuable when terminating a batch of trailer wiring or fitting numerous accessories in a canopy. Very long handles can be awkward in confined areas, however, so a compact crimper may be easier to use under a dash or inside a caravan cabinet.
Look for handles that stay secure on the steel frame and a head assembly with minimal side play. A little movement is normal, but loose pivot points make it harder to place the terminal accurately. A supplied case is handy for keeping interchangeable dies together, although the quality of the actual dies and ratchet mechanism matters far more than the case.
How to judge the finished crimp
A visual inspection is quick, but it should be followed by a firm pull test. Hold the terminal body, not the insulation, and pull the cable with sensible force. The conductor should not move. If it does, cut the terminal off and start again. Do not attempt to re-crimp a damaged terminal.
The crimp should be centred on the metal barrel, with no exposed copper beyond what the terminal design allows. There should be no crushed insulation, split barrel or sharply flattened section caused by using the wrong die. On heat-shrink terminals, apply heat only after the crimp has passed inspection. The sleeve should shrink evenly and seal around the cable without burning or hardening.
For critical circuits, especially higher-current runs, check the connection under load after installation. A warm terminal, discoloured insulation or voltage drop at the accessory points to a connection that needs attention. This is particularly relevant for fridge feeds, compressors, inverters, winches, DC-DC chargers and trailer charging circuits.
Where cheaper crimpers fall short
Budget ratchet crimpers can be perfectly serviceable for occasional light-duty jobs, but their tolerances vary. The common problems are uneven dies, an inconsistent release point, loose pivots and terminal cavities that do not properly match the stated size. A tool can feel solid yet still produce an off-centre or under-compressed crimp.
That does not mean every expensive crimper is automatically the right buy. A professional installer may benefit from purpose-built tools for insulated terminals, heat-shrink terminals, open-barrel terminals and large lugs. A camper wiring a single drawer system may only need one quality insulated-terminal ratchet crimper, provided the terminal range and cable sizes are planned first.
The value calculation comes down to repeatability and application. If the tool will be used for repairs on the road, trailer lighting, accessory wiring and general workshop jobs, a reliable ratchet unit is easier to justify than a cheap multi-tool that compromises every crimp. For specialised connectors, spend on the dedicated die or tool before spending on more features.
Choosing the right tool for your wiring job
Start with the connector family you actually use. For common insulated ring terminals, spade terminals, butt connectors and blade terminals, choose a ratchet crimper designed specifically for insulated terminals in the relevant cable range. For adhesive-lined heat-shrink terminals, select jaws suited to that style. For OEM plugs, Deutsch-style contacts or open-barrel terminals, use the specified contact crimper.
Also consider access to replacement terminals. A quality crimper works best when paired with correctly sized, consistent terminals rather than mixed assortments of unknown origin. Bluebar Industries supplies automotive electrical tools and terminals for practical 12V and 24V work, making it easier to keep the cable, connector and crimping method matched across an installation.
A ratchet crimper should make every termination more predictable, not merely easier to squeeze. Match the die to the terminal, match the terminal to the cable, test your first few crimps, and the wiring behind the panel will be far less likely to become the problem that ends a trip early.











