


 Cable Automotive / Marine




 Cable Lugs
 Cable Lug Assortment Kits
 Cable Lugs Straight Wall Closed
 Cable Glands
 Convoluted Split Tubing
 12/24v Products & Access




 Electrical Connectors





 Solar Powered Products



 LED Lights







 Tools










 Auto Parts & Categories



 Fittings








 Cleaning & Misc





 Clearance & Promotion
Latest News
How to Mount LED Work Lights on Your 4WD
Sep
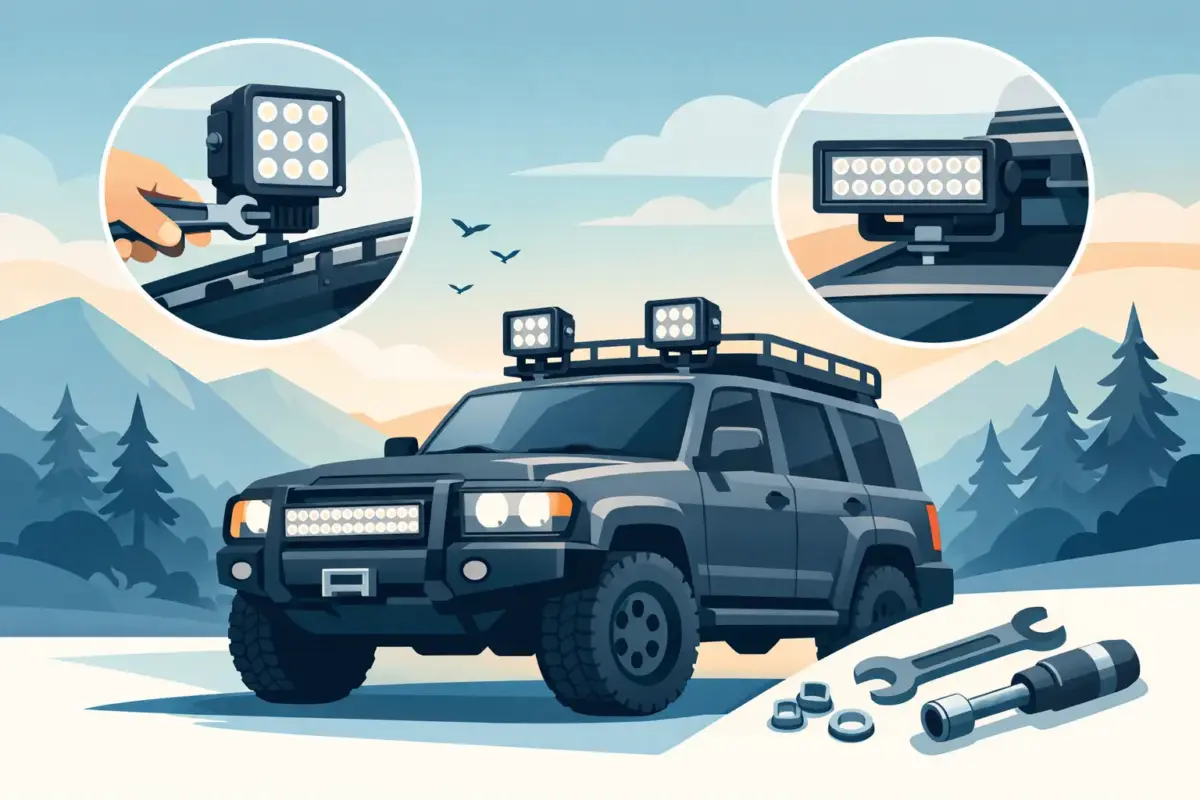
A work light that shakes loose on corrugations, shines into the rear-view mirror or fills with water after the first creek crossing is not much use. Knowing how to mount LED work lights properly means choosing a solid mounting point, protecting the wiring and aiming the beam for the job – whether that is reversing a caravan, lighting a tray, working around machinery or setting up camp after dark.
LED work lights are compact and draw less current than older halogen lamps, but the installation still needs to be treated as a proper 12V or 24V electrical job. The light body, bracket, fasteners, cable routing, fuse and switching method all matter. A clean installation will last longer, be easier to service and avoid problems with vibration, water and voltage drop.
Choose the right mounting position
Start with what the light needs to illuminate. Rear-facing work lights are commonly fitted high on a roof rack, canopy, rear bar or headboard so the beam reaches beyond the vehicle without being blocked by the tray or spare wheel. A lower mounting position can be better for lighting directly behind a caravan or around a work area, but it may throw longer shadows and cop more road spray.
Side-facing lights work well on canopy corners, roof racks and awnings when setting up camp or accessing toolboxes. Forward-facing work lights can assist with slow off-road work, but they should not be used as road-going driving lights. Check the applicable ADR requirements and local road rules before fitting any forward-facing auxiliary lighting, particularly if it can be switched on while driving on public roads.
On a 4WD or ute, avoid mounting lights where they can be struck by branches, interfere with tailgates, obstruct cameras, or make it difficult to remove a spare wheel. On caravans and trailers, allow for body flex and ensure the light will not foul an awning, hatch or door. For machinery, keep lights clear of moving components, heat sources and service points.
Before drilling, hold the light in place and check it from several angles. Look through the rear-view mirror, open all nearby doors and hatches, and confirm that the cable entry will be protected. Five minutes spent test-fitting can prevent an unnecessary hole in a canopy or vehicle body.
Use a mounting surface that can handle vibration
The bracket is only as strong as the material beneath it. Steel bars, canopy frames, roof-rack crossbars and purpose-made light tabs are generally suitable mounting points. Thin sheet metal, plastic trim and unsupported aluminium panels may flex over time, allowing the light to move or crack the surface around the fasteners.
If the panel is thin but it is the only practical location, fit a backing plate or large washers behind it to spread the load. Use corrosion-resistant fasteners suited to the material. Stainless hardware is common for exterior installations, although care is needed where stainless contacts aluminium because galvanic corrosion can occur in wet or salty conditions. A nylon isolator, suitable sealant or a properly finished coating can help separate dissimilar metals.
Most LED work lights use a single centre mounting bolt or a side bracket. Centre mounts make aiming simple and suit roof racks, bars and flat tabs. Side brackets give a wider footprint and can be more stable on a canopy or headboard. Whichever style you use, fit spring washers, nyloc nuts or thread-locking compound where appropriate. Corrugations will find loose hardware quickly.
Do not overtighten the light housing or bracket. Many housings are aluminium, and excessive force can damage threads, distort the bracket or make adjustment difficult later. Tighten the mounting hardware firmly, aim the light, then do a final check after the first rough trip.
Drill, protect and seal every hole
When drilling into a steel canopy, tray, bar or body panel, centre-punch the hole first so the drill does not wander. Drill a small pilot hole, then step up to the correct size. Remove burrs from both sides. Sharp edges can damage paint, cut cable insulation and start corrosion.
Treat exposed steel with a suitable rust-prevention coating before fitting the hardware. For holes carrying cable, use a correctly sized rubber grommet or cable gland. A grommet protects the sheath from vibration; a gland also provides a tighter seal against dust and water. Finish around exterior holes with an automotive-grade sealant where needed, but do not rely on sealant alone in place of a grommet or proper cable gland.
Wire the lights for the system voltage and load
Confirm whether the work light is rated for 12V, 24V or multi-voltage operation before wiring it. Many quality LED work lights accept a broad voltage range, but never assume. A 12V-only light fitted to a 24V truck or machine can fail immediately.
Work lights should be supplied through an appropriately rated fuse placed as close as practical to the battery or auxiliary power source. The fuse protects the cable, not just the light. Select cable size based on the total current draw, cable length and allowable voltage drop. Small LED lights may only draw a few amps, but long runs to a rear bar, roof rack or caravan can still suffer voltage drop if the cable is undersized.
For a single light close to the battery, twin sheathed automotive cable may be adequate. For multiple lights, a long rear run or higher-output units, step up the cable size and calculate the load properly. In trade installations, allow for future additions if the cable route and fuse block are being installed at the same time.
Use a relay when the combined load exceeds the switch rating, when the switch is only intended as a trigger, or when a conventional relay harness is the cleanest solution. Some low-current LED circuits can be switched directly with a correctly rated switch, but relay-controlled wiring remains a dependable approach for multi-light setups. A fused distribution block can also keep auxiliary circuits organised in a canopy, service body or caravan.
Make every connection with quality terminals and the correct crimping tool. Heat-shrink crimp terminals are a practical choice for exterior and underbody locations because they provide strain relief and help seal the join. Avoid twisting wires together and covering them with tape. Tape loosens with heat, dust and vibration, and it does not provide a reliable mechanical or weatherproof connection.
Route cable away from heat, movement and sharp edges
Follow existing factory looms where possible, but do not cable-tie directly to fuel lines, brake lines, steering components or air-conditioning pipes. Keep wiring clear of exhausts, turbochargers, sharp chassis edges and suspension travel. On trailers and caravans, allow enough slack at moving or folding sections without leaving cable exposed to snagging.
Split conduit, corrugated tubing or braided sleeving provides useful mechanical protection. Secure the cable at regular intervals with quality cable ties, P-clips or mounting bases suited to the environment. Under a vehicle, P-clips and conduit generally last better than relying on cable ties alone.
Earth returns deserve the same attention as positive wiring. A short, clean chassis earth may work well on a vehicle, provided the mounting point is bare metal, protected after connection and suitable for the current draw. For caravans, trailers, marine applications and higher-current lighting circuits, running a dedicated negative cable back to a negative busbar or battery is often the more reliable option. It reduces the chance of poor earths caused by painted panels, corrosion or inconsistent chassis continuity.
Aim work lights for useful coverage, not maximum glare
Fit the lights, wire them and test them at night before locking everything down. Rear work lights should illuminate the ground and working area behind the vehicle without blasting the horizon or reflecting heavily from a white caravan, toolbox or canopy door. A slight downward angle is usually more useful than pointing straight back.
For campsite lights, wide flood beams mounted high can provide good coverage, but they can also disturb nearby campers. Angle them down and use an independent switch so they are only on when needed. Spot beams reach further but leave dark areas close to the vehicle, while flood beams cover a wider area at shorter range. Many installations benefit from a combination, depending on the actual task.
Check for glare in mirrors, reflections from number plates and shadows caused by recovery gear, spare wheels or tray sides. Adjusting a light by only a few degrees can make a substantial difference.
Test the installation before relying on it
With the engine running or the battery system under normal operating voltage, switch the lights on and check for flickering, heat at terminals, loose brackets and poor beam coverage. Confirm the fuse rating is correct and that the switch, relay and wiring remain cool in use. If a light is mounted on a removable canopy or roof rack, make sure any connector is weatherproof, strain-relieved and easy to disconnect without pulling on the cable.
After the first off-road trip, washdown or several weeks of normal use, inspect the fasteners and cable protection again. This is particularly worthwhile on vehicles used on corrugated tracks, beaches, mine sites or wet boat ramps.
A properly mounted LED work light should feel like part of the vehicle, not an accessory waiting to fail. Use fit-for-purpose brackets, protected cable and correctly rated electrical components, and the light will be ready when the track, job site or camp setup runs past daylight.











